Dating Profile Photos: Light, Poses, and Real Results
Published on 1/17/2025 • 6 min read
I remember the first time I set up a proper photoshoot for my dating profile: nerves, overthinking, and the belief that I needed a pro to look good. That afternoon taught me a simple truth: light, pose, and intentional choices can make a huge difference without studio gear. You don’t need a fancy setup to get real results—just reliable techniques, practice, and a dash of guts to show your real self.
Why this matters: in a swipe-first world, your pictures are your handshake, opener, and first impression all rolled into one. People decide within seconds whether to keep reading. The right photos invite conversations; the wrong ones shut doors. Below are practical tips (and a few goofs I’ll admit to) so you can create a profile that feels like you and performs better.
Start with light: the single biggest upgrade
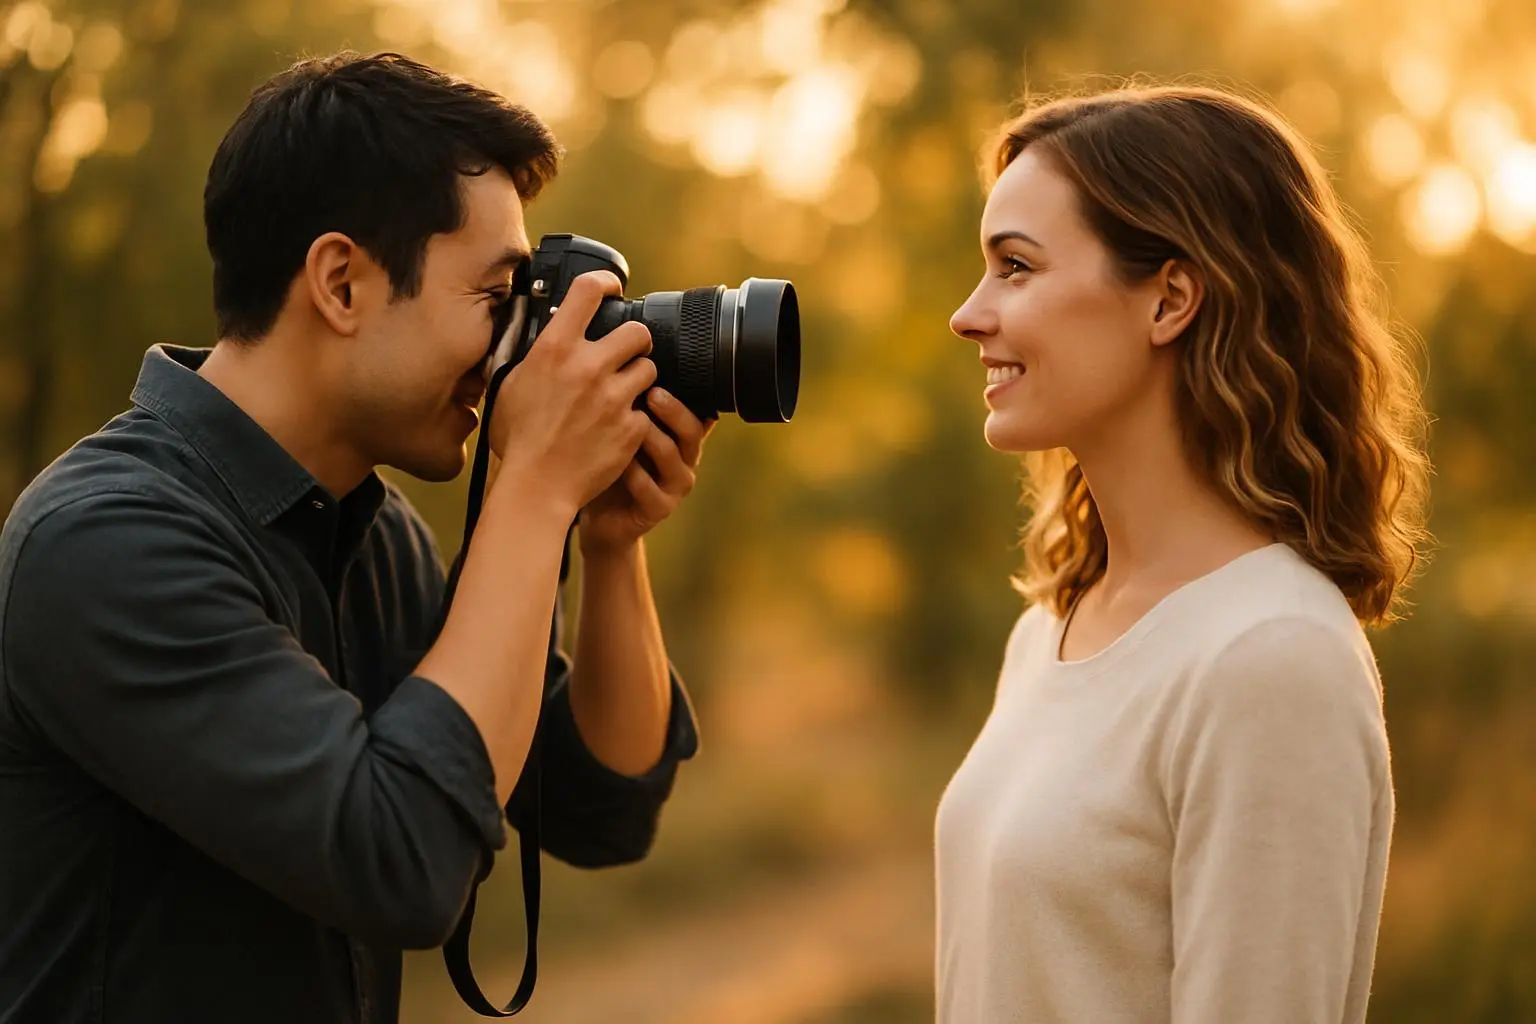
If I could give one rule, it would be: chase good light first. Everything else—pose, outfit—shines only when the light works.
Golden hour (the hour after sunrise or before sunset) is magic. Warm, soft light smooths skin and brightens eyes with gentle shadows. I try to schedule casual shoots around this window when possible.
Indoors, stand facing a large window. Window light acts like a softbox: even, directional, flattering. Avoid overhead bulbs; they create harsh shadows around eyes and jaw.
Open shade is your friend: step under a tree or beside a building on bright days to get soft, even illumination. Direct noon sun causes squinting and harsh shadows—move or wait.
Artificial light can work: a ring light or soft LED panel gives consistent results. For most dating photos I prefer natural light for approachability, but if you rely on artificial light, aim for soft, diffused sources and a secondary reflector to fill shadows.
Frames that flatter: composition and backgrounds
A great lighted photo still underperforms if the background is messy. The background should support the story you want to tell.
Keep backgrounds simple and meaningful: a clean wall, a bookshelf, a café window, or a park path. The goal is to complement, not compete.
Use depth: stand a few feet from the background and let the camera focus on you so the background blurs slightly (bokeh). That separation makes you pop.
Avoid bathrooms, cluttered rooms, and chaotic interiors. These distract and read as careless.
A quick composition trick: enable your phone’s grid and place your eyes near an upper grid intersection rather than dead center. It’s a small shift that creates more visual interest.
Poses that look natural (and confident)
Posing isn’t about memorizing rigid moves—it's about small adjustments that communicate ease. Here’s what I do and why it works.
Angle your body 30–45 degrees away from the camera to add shape and avoid a stiff straight-on look.
Shift your weight to your back leg and relax the front leg to create a natural S-curve.
Create space with your arms—hands in pockets, a relaxed elbow on a railing, or a hand on a jacket lapel to open the frame and look intentional.
For chin and jaw: bring your ears slightly forward as if lengthening your neck. It helps define the jawline and reduces a double chin.
Movement beats stiffness: walk toward the camera, laugh mid-conversation, or pick up a coffee. Subtle motion reads candid and approachable.
Expressions: make smiles feel real
The difference between a 'liked' smile and one that stops scrolling is genuineness. Forced smiles show; authentic ones don’t.
Think of something that genuinely amuses you, even a tiny memory—this creates a sparkle in your eyes. I sometimes run through a silly memory right before the shutter.
Try a range: a full smile, a softer grin, and a relaxed neutral with engaged eyes. Different people respond to different energies.
The must-have shots (and why)
Aim for a balanced set of 5–7 photos—enough variety to tell a story without overwhelming viewers.
- Clear headshot (primary): chest-up or shoulders-up, eyes visible, well-lit, no sunglasses.
- Full-body shot: at least one honest full-body image. Pose naturally (walking, leaning) so it doesn't feel staged.
- Lifestyle shot: show you doing something you love—cooking, hiking, playing an instrument.
- Social shot: one photo with friends signals you're social. Make sure it’s obvious who you are.
- Optional travel/adventure shot: only if it shows your face clearly.
I like ending the sequence with a candid laughing shot—it humanizes the profile and invites warmth.
Outfits that photograph well (without losing you)
Dress in a way that feels authentic but put-together. The goal isn’t a new persona—it’s your most confident self.
Fit matters more than style: clothes that fit well translate as confidence.
Favor jewel tones or colors that complement your skin tone—these read well on small phone screens.
Avoid overly busy patterns that distract from your face; solids or simple patterns photograph more reliably.
Layering adds texture—light jacket, scarf, or an open shirt over a tee can change the energy quickly.
DIY photoshoot: exact mini-playbook I use (reproducible)
This is a step-by-step workflow you can copy exactly.
Gear
- Phone: any recent model with portrait mode.
- Tripod: a small tabletop or full-size tripod.
- Reflector: white foam core or collapsible 5-in-1 (use the white side).
- Remote/timer: Bluetooth shutter or 10-second timer.
Setup and distance
- Tripod height: eye level for most people.
- Distance: 2.5–4 m from the camera for head-to-chest shots; 4–6 m for full-body.
- Lens: use the main lens and enable portrait mode if available.
Lighting and reflector placement
- Window setup: face the window at a 20–45 degree angle. If light is strong, diffuse with a thin curtain.
- Reflector: hold opposite the window at a 30–45 degree angle to fill shadows.
- Golden hour: position so the sun is behind or at 45 degrees for a soft rim.
Camera settings and framing
- Use the grid; place eyes near the top third intersection.
- Exposure: tap your face and adjust exposure to keep highlights from clipping.
- White balance: auto is fine; tweak toward neutral if skin looks off.
Shooting routine
- Take 20–50 photos per outfit and movement—smiles, neutrals, and motion.
- Change angles: shoot from low, straight, and slightly above eye level.
- Rest and review: let images sit a bit before final selection.
Editing: less is usually more
A gentle pass improves photos—brightness, contrast, and color temperature—but heavy filters betray authenticity.
Crop and straighten first. Then adjust exposure, contrast, and color temperature so skin looks natural.
Avoid extreme smoothing, face reshaping, or obvious color tints. Would you recognize yourself in this edited photo? If not, dial it back.
Common mistakes I avoid
- Mirror selfies as primary images; they feel informal and distort perspective.
- Heavy filters and drastic retouches that don’t match reality.
- Sunglasses or hats in every photo—eyes matter, especially in the main shot.
- No full-body photo; it breeds suspicion.
- Group photos as the primary image—confusing for viewers.
Strategy: order, A/B testing, and refreshing
Photos aren’t set-and-forget. Order and testing matter.
Order: lead with a strong headshot, follow with a full-body shot, then lifestyle and social images. Mix energy so each image adds something new.
A/B testing (practical and measurable)
- What to track: profile views, matches, message rate.
- Sample size: run tests until you have at least 200–500 impressions per variant for signals.
- Time window: test each variant for 1–2 weeks to smooth daily/weekly patterns.
- Metrics: click-through or tap rate on profile, message initiation rate, and match rate. Small percentage changes (5–15%) can be meaningful.
Refresh cadence: update photos seasonally or when your look changes. I rotate one or two shots every month and watch engagement shift.
Authenticity wins: tell a real story
Technical skill doesn’t beat authenticity. People respond to realness: imperfect smiles, a laugh caught mid-moment, or a photo of you doing something you love.
I’ve seen flawless photos fail because they felt staged. A well-lit, honest shot of someone living their life brings messages and real conversations.
Disclosure and alternatives to photo-rating tools
Transparency: I use a photo-rating tool after shoots to reduce bias in selection. I’m not a paid spokesperson for any tool. If you want automated help, there are several options, but treat results as data and couple them with your own judgment.
Quick measurement tip: when you change a primary photo, track your profile views and message rate for two weeks and compare to the prior two weeks. Note any uplift as a percentage.
Quick-start checklist
- Main photo: clear, well-lit headshot with visible eyes.
- Full-body photo: at least one honest image.
- Variety: show face, body, interests, social life.
- Clothes: authentic and well-fitted.
- Edits: subtle and representative of how you look.
- Cohesion: photos tell a coherent story.
If you can answer yes to most of these, you’re ready to go.
Parting note
Dating-profile photography is empathy plus technique. You’re showing a window into your life—make it warm, honest, and interesting. With good light, thoughtful poses, and authenticity, you’ll attract people who actually want what you want. Now go take photos that feel like you.
References
Ready to Optimize Your Dating Profile?
Get the complete step-by-step guide with proven strategies, photo selection tips, and real examples that work.